In the previous blog post, we already restructured the project to create separate modules. We created an input handling system as well as player and enemy movement behaviours. Seems quite simple but it took a bit of thought and iterations to get it right.
The plan for this blog post is to move the rendering logic into systems, which will require us to create custom phases. Flecs enables us to create custom phases to determine the order of systems, and we will take full advantage of this. While I was working on moving the logic to the rendering module, I played around with GUI elements, but it was pretty tedious due to the fact that I had to draw them at pixel coordinates. I wanted to make sure that no matter the screen size, the elements would be placed where I wanted. To do this, we will also introduce an anchorage system for GUI elements.
Rendering Pipeline
Last we left off, our main loop function was starting to get a bit messy. We have a few different functions to draw objects and text all in the loop. While it might not seem so bad right now, this is in no way scalable if we want to add UI and more enemies. This is what the code looks like now.
void Game::run() {
    // Main game loop
    while (!WindowShouldClose()) // Detect window close button or ESC key
    {
        BeginDrawing();

        ClearBackground(RAYWHITE);

        DrawCircle(
            m_world.entity("enemy").get<core::Position2D>()->value.x,
            m_world.entity("enemy").get<core::Position2D>()->value.y,
            25.0,
            RED);

        DrawCircle(
            m_world.entity("player").get<core::Position2D>()->value.x,
            m_world.entity("player").get<core::Position2D>()->value.y,
            25.0,
            GREEN);

        m_world.progress(GetFrameTime());
        DrawFPS(10, 10);

        DrawText("Congrats! You created your first window!", 190, 200, 20, LIGHTGRAY);

        EndDrawing();
    }

    // De-Initialization
    //--------------------------------------------------------------------------------------
    CloseWindow(); // Close window and OpenGL context
    //--------------------------------------------------------------------------------------
}
This is what I wish the code could look like:
void Game::run() {

	while (!WindowShouldClose()) // Detect window close button or ESC key
        {
            m_world.progress(GetFrameTime());
        }

    	CloseWindow(); // Close window and OpenGL context
}
Much better isn't it? But where will all of our rendering logic go? We'll create more systems and components in a new rendering module.
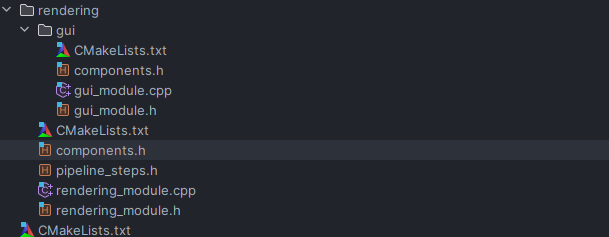
Like our previous modules, we will create a new folder "rendering" and a sub folder "gui" for our two new modules RenderingModule and GuiModule. If we go back to our current main loop, we can see that it always starts with "BeginDrawing()" and always ends with "EndDrawing()", and everything in the middle is either rendering entities or GUI. I want to make sure that this drawing order is respected otherwise we might draw before "BeginDrawing()" is called, or we could draw entities over the GUI elements. Maybe you noticed something different about this rendering module. We will create an additional file to define our new custom pipeline steps. These will reflect the order we described above: PreRender, Render, RenderGUI, PostRender.
#ifndef RENDERING_PIPELINE_STEPS_H
#define RENDERING_PIPELINE_STEPS_H

namespace rendering {
    struct PreRender{};
    struct Render{};
    struct RenderGUI{};
    struct PostRender{};
}

#endif //RENDERING_PIPELINE_STEPS_H
In our rendering module let's make sure that we override the register_pipeline template function, and register our new phases. We'll set the PreRender phase to depend on the PostUpdate phase. This will run any systems set to run in the PreRender phase to run after the PostUpdate phase. Then we will cascade the other phases in the same way, Render depends on PreRender, RenderGUI on Render, and PostRender on RenderGUI. Now our phases will execute in the order we intend, even If we declare systems of different phases in mismatching orders.
namespace rendering {
    class RenderingModule: public BaseModule<RenderingModule> {
    public:
        RenderingModule(flecs::world world): BaseModule(world) {}

    private:
        void register_components(flecs::world world);
        void register_systems(flecs::world world);
        void register_pipeline(flecs::world world);
        void register_submodules(flecs::world world);

        friend class BaseModule<RenderingModule>;
    };
}

...

// In rendering_module.cpp

void rendering::RenderingModule::register_pipeline(flecs::world world) {
    world.component<PreRender>().add(flecs::Phase).depends_on(flecs::PostUpdate);
    world.component<Render>().add(flecs::Phase).depends_on<PreRender>();
    world.component<RenderGUI>().add(flecs::Phase).depends_on<Render>();
    world.component<PostRender>().add(flecs::Phase).depends_on<RenderGUI>();
}

...
In the code, snippet above, we also have a new template method called "register_submodules". Since GUI is part of the rendering, I wanted to place the logic for both in one place, however, this would lead to a very big module. It would have taken care of rendering game entities as well as the graphical interface, with systems intertwined, I could foresee a big mess. Instead, I made the GUI module a separate one, but when you import the rendering module, you would also need the GUI module, as such, GUIModule is now a submodule of RenderingModule.
BaseModule(flecs::world &world) {
        std::cout << "Creating Module " << typeid(T).name() << std::endl;
        // Register the instance
        world.module<T>();
        static_cast<T *>(this)->register_components(world);
        static_cast<T *>(this)->register_pipeline(world);
        static_cast<T *>(this)->register_systems(world);
        static_cast<T *>(this)->register_submodules(world);
    }

    void register_submodules(flecs::world &world) {
        std::cout << "No sub module registration implemented" << std::endl;
    }
    ...

    // In rendering_module.cpp
    ...
    void rendering::RenderingModule::register_submodules(flecs::world world) {
        world.import<GUIModule>();
    }
    ...
Now that our module is set up, let's start moving some logic! We will move BeginDrawing() and ClearBackground() into a PreRender system, EndDrawing() in a PostRender system, and create a system that will require entities to have a Position, a Circle Component, and a Color Component, which will draw a coloured circle at a position, like we had in our main loop.
// in rendering/components.h

struct Circle {
    float radius;
};

// in rendering_module.cpp

world.system("Before Draw")
    .kind<PreRender>()
    .run([](flecs::iter &iter) {
    	BeginDrawing();
    	ClearBackground(GetColor(GuiGetStyle(DEFAULT, BACKGROUND_COLOR)));
});

world.system("After Draw")
    .kind<PostRender>()
    .run([](flecs::iter &iter) {
    	EndDrawing();
    });

world.system<const Circle, const core::Position2D, const Color>()
    .kind<Render>()
    .each([](const Circle &circle, const core::Position2D &position, const Color &color) {
    	DrawCircle(position.value.x, position.value.y, circle.radius, color);
});
Let's do the same with the GUI functions and while we are at it, let's also remove the placeholder drawtext function.
world.system("Draw FPS")
    .kind<RenderGUI>()
    .run([](flecs::iter &iter) {
        DrawFPS(10, 10);
});
This means our main function now looks like below. A lot cleaner.
void Game::run() {
// Main game loop
while (!WindowShouldClose()) // Detect window close button or ESC key
{
m_world.progress(GetFrameTime());
}
CloseWindow(); // Close window and OpenGL context
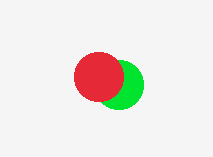
}While we are here, let's fix an issue. Currently, we are drawing circles in the order they were instantiated. In this case, we first create the player, and then we create an enemy, and whatever is rendered last, will appear on top on the screen. I am assuming that most of the time we will want the player to be on top rather than an enemy. So there are a couple ways we fix this.
- We could instantiate the player last, but this will soon cause us more problems since we want to add more and more enemies as the game goes on, which will be drawn over the player.
- We could create two separate systems, one to draw the player, and the other to draw the enemies, making sure that the player drawing system is created after the enemy one. While this solution will work properly we have to create an identical system that will act on two separate entity pools, it would introduce code duplication and redundancy.
- Finally what we will implement is a priority component, and group the entities in the system according to this priority. What is neat with this solution is that we don't need to add the priority component to all the entities we want to draw, only the ones that should be drawn first, let me illustrate this.
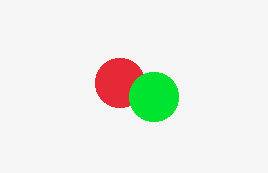
We can create a Priority tag in the rendering module, and add it to the player, pairing it with a numerical value representing the drawing priority. The higher the value, the later it will be drawn. We won't add it to the enemy and the system will draw it first.
flecs::entity player = m_world.entity("player")
            .set<core::Position2D>({0, 0})
            .set<core::Speed>({300})
            .set<physics::Velocity2D>({0, 0})
            .set<physics::DesiredVelocity2D>({0, 0})
            .set<physics::AccelerationSpeed>({5.0})
            .set<rendering::Circle>({25})
            .set<Color>({GREEN})
            .add<rendering::Priority>(1);

m_world.entity("enemy")
            .set<core::Position2D>({800, 400})
            .set<core::Speed>({150})
            .set<physics::Velocity2D>({0, 0})
            .set<physics::DesiredVelocity2D>({0, 0})
            .set<physics::AccelerationSpeed>({5.0})
            .set<ai::Target>({"player"})
            .add<ai::FollowTarget>()
            .set<ai::StoppingDistance>({50.0})
            .set<rendering::Circle>({25})
            .set<Color>({RED});

world.system<const Circle, const core::Position2D, const Color>()
    .kind<Render>()
    .group_by<Priority>()
    .each([](const Circle &circle, const core::Position2D &position, const Color &color) {
        DrawCircle(position.value.x, position.value.y, circle.radius, color);
});
GUI and Anchors
Before moving on to gameplay systems, I wanted to lay down the frameworks for a GUI module that would dynamically adjust to the screen size, allowing for the game to be displayed and played on a variety of resolutions. First, let's use raylib's GUI solution: raygui. To use ragui, we need to add it to our project's include folder. We will also add the custom styles that raygui offers to a resources folder. In both CMakeLists.txt we put the following line:
target_include_directories(${LIBRARY_NAME} PUBLIC "./")
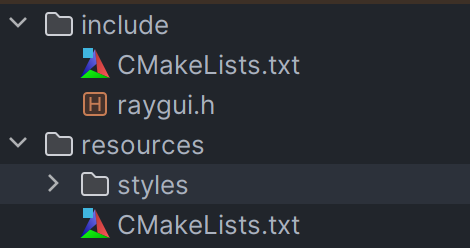
In our root CMakeLists.txt file, we add the new subdirectories.
add_subdirectory("src")
add_subdirectory("include")
add_subdirectory("resources")
add_subdirectory("app")
Finally, we need to make sure that when we build the game, the executable has access to the resources folder, we will introduce a new build step that copies the directory to the target location.
// in app/CMakeLists.txt

add_executable(${PROJECT_NAME} "main.cpp")

// this will copy over the resources to the binary directory
add_custom_target(copy_resources ALL
        COMMAND ${CMAKE_COMMAND} -E copy_directory
        ${PROJECT_SOURCE_DIR}/resources
        ${PROJECT_BINARY_DIR}/resources
        COMMENT "Copying resources into binary directory")

add_dependencies(${PROJECT_NAME} copy_resources)

target_link_libraries(${PROJECT_NAME} PUBLIC
        ${LIBRARY_NAME}
        raylib
        flecs::flecs_static)
Finally, we need to define RAYGUI_IMPLEMENTATION in our GUIModule, make sure this is only written in one place.
#define RAYGUI_IMPLEMENTATION
namespace rendering::gui {
	// gui module definition
    // .....
}
Perfect, now that we have raygui setup properly, lets get started with our GUI elements. Let's define a few to start. Let's make systems to draw Buttons, Panels, Text, and an Outline decoration for GUI elements.
struct Button {
    std::string text;
    // not sure this is the best thing to store
    flecs::system on_click_system;
};

struct Text {
    std::string text;
    int alignment;
};

struct Outline {
    int border_size;
	Color border_color;
	Color fill_color;
};

struct Panel {
    std::string name;
};world.system<const Button, const Rectangle>("Draw Button")
.kind<RenderGUI>()
.each([](const Button &button, const Rectangle &rect) {
if (GuiButton(rect, button.text.c_str())) {
button.on_click_system.run();
}
});
world.system<const Panel, const Rectangle>("Draw Panel")
.kind<RenderGUI>()
.each([](const Panel &panel, const Rectangle &rect) {
GuiPanel(rect, panel.name.c_str());
});
world.system<const Text, const Rectangle>("Draw Text")
.kind<RenderGUI>()
.each([](const Text &text, const Rectangle &rect) {
GuiDrawText(text.text.c_str(), rect, text.alignment, font_color());
});
world.system<const Rectangle, const Outline>("Draw Outline")
.kind<RenderGUI>()
.each([](const Rectangle &rect, const Outline &outline) {
GuiDrawRectangle(rect, outline.border_size, outline.border_color, outline.fill_color);
});We'll create a main canvas that will hold all of our GUI entities.
m_world.entity("gui_canvas").set<Rectangle>({
        0, 0, static_cast<float>(m_windowWidth), static_cast<float>(m_windowHeight)
});

m_world.entity("button 1").child_of(m_world.lookup("gui_canvas"))
    .set<rendering::gui::Button>({
        "A Button",
        m_world.system<const core::Position2D>().kind(0).each(
            [](flecs::entity e, const core::Position2D &position) {
                std::printf("Button Clicked\n");
                std::printf("Entity name: %s \n", e.name().c_str());
                std::printf("Position: (%f, %f) \n", position.value.x,
                    position.value.y);
         })
    })
.set<Rectangle>({m_windowWidth / 2.f - 150, m_windowHeight / 2.f - 50, 300, 100});One thing that is bothering me with this implementation is that we set the button rectangle to be at the centre of the screen for the initial resolution, but as soon as we change the screen size, the button will keep the same position instead of going to the centre as we might expect.
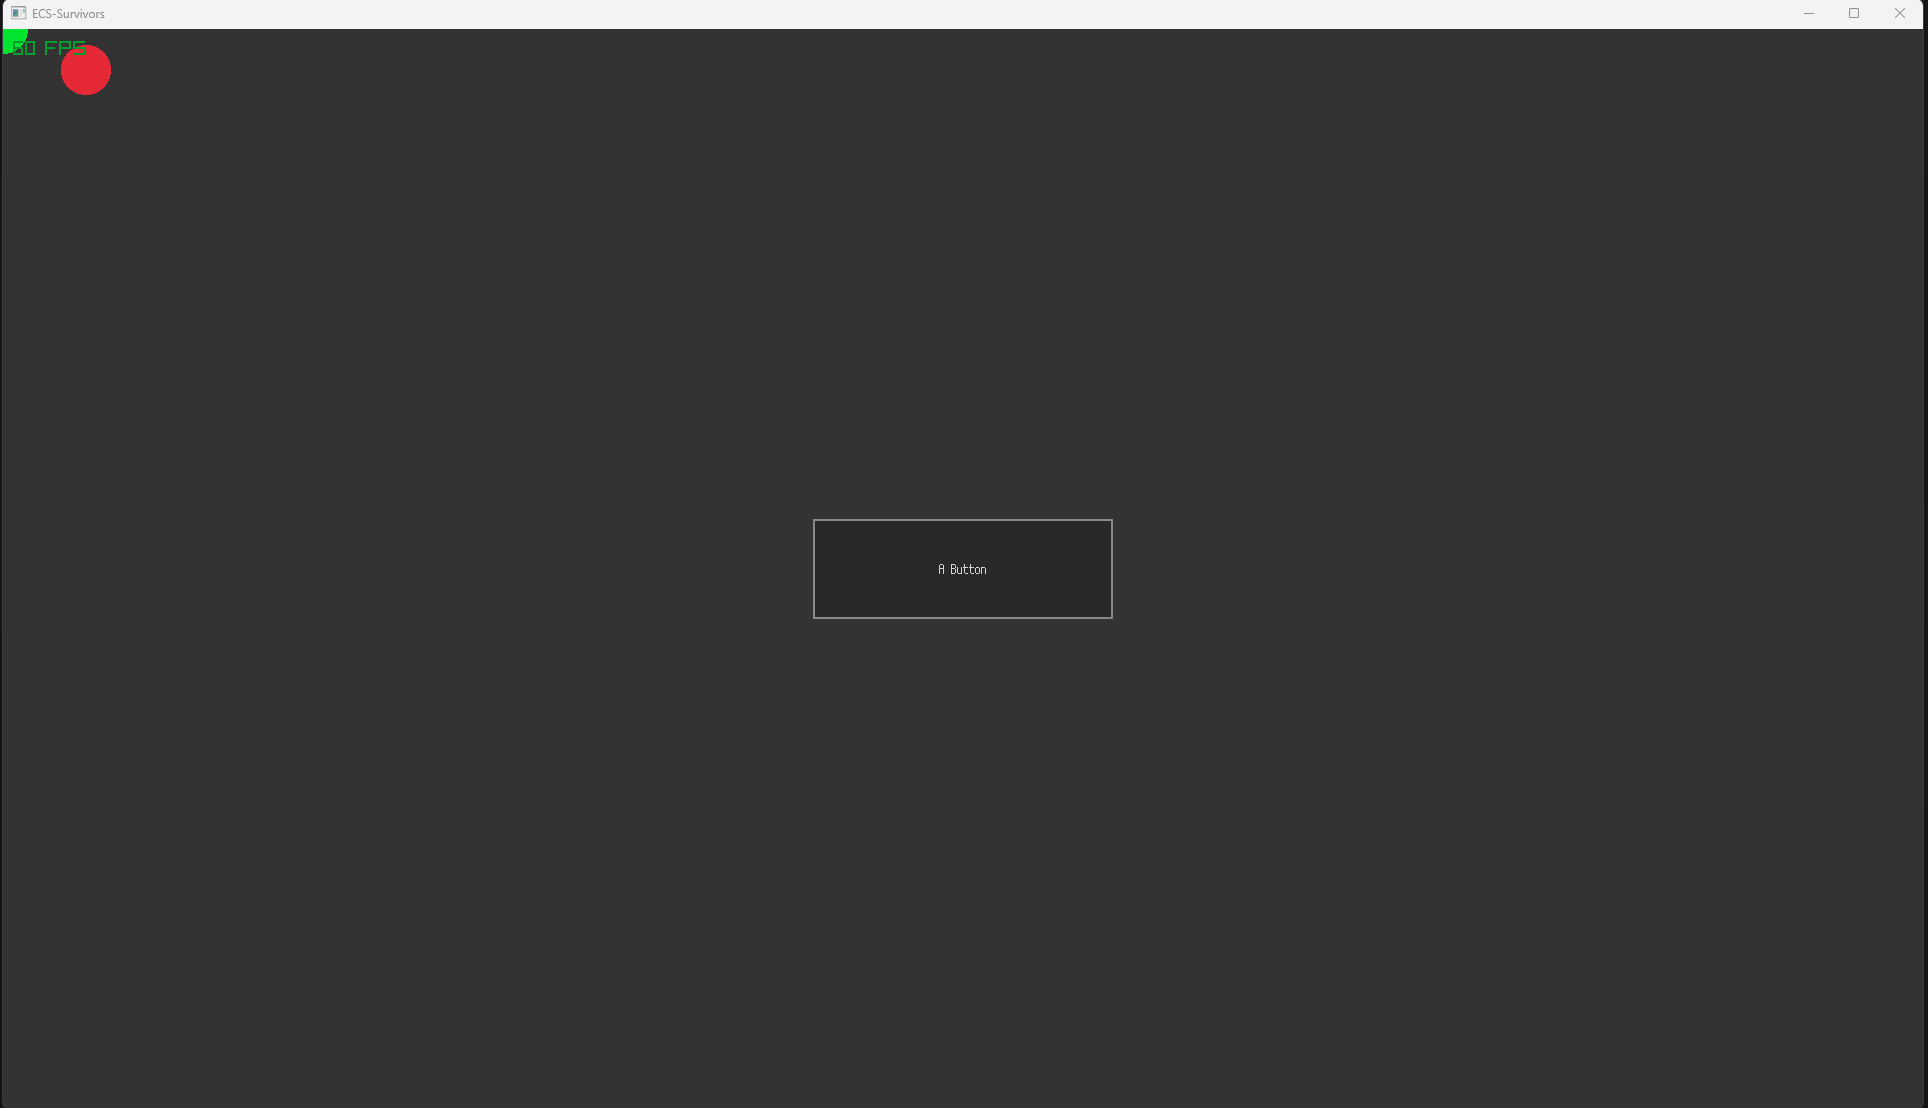
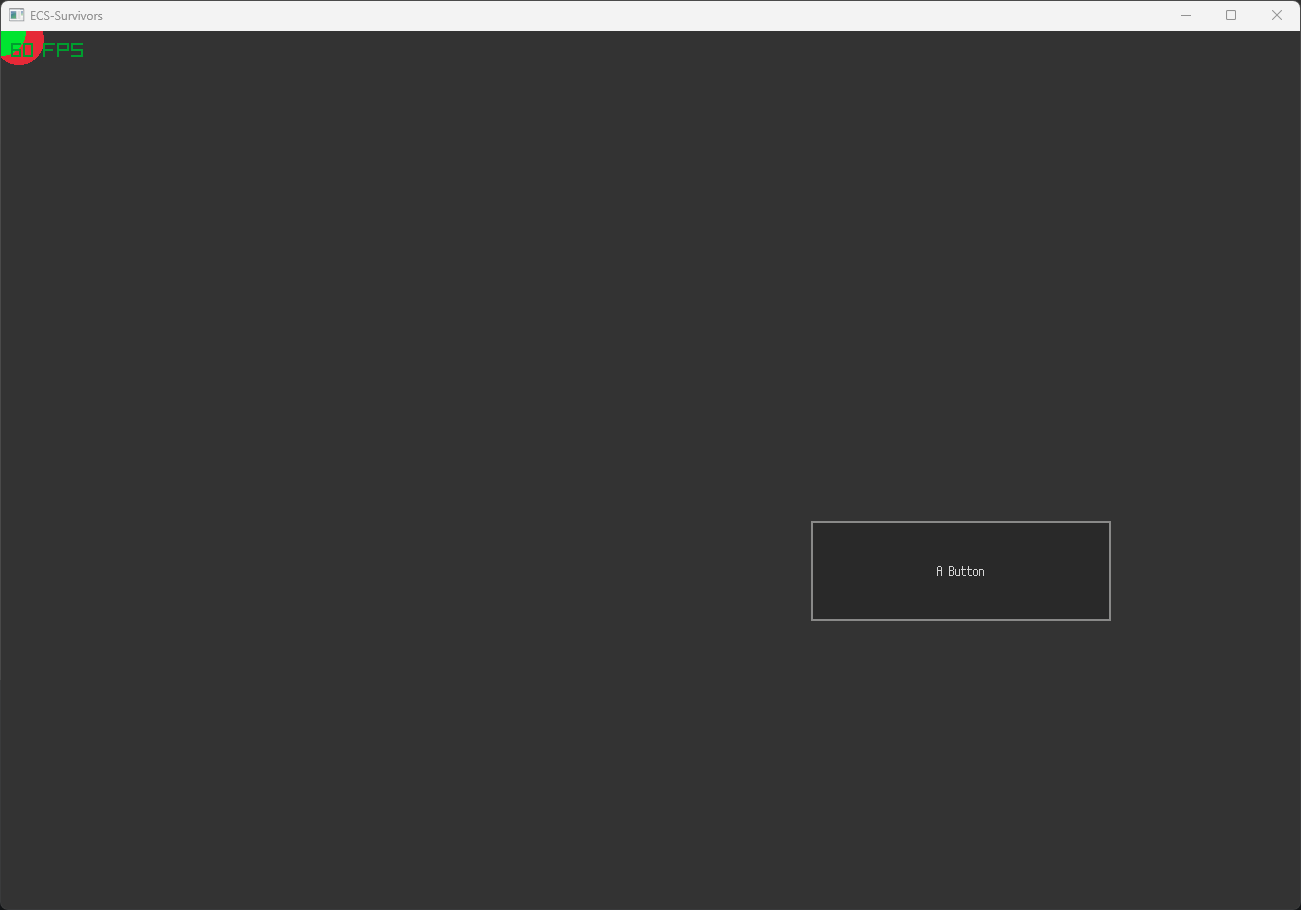
To fix this we will introduce anchors. To facilitate using these components we will create two constructors for the Anchor struct, and create a system to assign the position from the Rectangle component over to the Anchor component.
enum HORIZONTAL_ANCHOR {
    LEFT,
    CENTER,
    RIGHT
};

enum VERTICAL_ANCHOR {
    TOP,
    MIDDLE,
    BOTTOM
};

struct Anchor {
    Vector2 position;
    HORIZONTAL_ANCHOR horizontal_anchor;
    VERTICAL_ANCHOR vertical_anchor;

    Anchor() {
        position = {};
        this->horizontal_anchor = HORIZONTAL_ANCHOR::LEFT;
        this->vertical_anchor = VERTICAL_ANCHOR::TOP;
    };

    Anchor(HORIZONTAL_ANCHOR horizontal_anchor, VERTICAL_ANCHOR vertical_anchor) {
        position = {};
        this->horizontal_anchor = horizontal_anchor;
        this->vertical_anchor = vertical_anchor;
    }
};world.system<const Rectangle, Anchor>("on start, set anchored position")
.kind(flecs::OnStart)
.each([](const Rectangle &rectangle, Anchor &anchor) {
anchor.position.x = rectangle.x;
anchor.position.y = rectangle.y;
});m_world.entity("button 1").child_of(m_world.lookup("gui_canvas"))
.set<rendering::gui::Button>({
"A Button",
m_world.system<const core::Position2D>().kind(0).each(
[](flecs::entity e, const core::Position2D &position) {
std::printf("Button Clicked\n");
std::printf("Entity name: %s \n", e.name().c_str());
std::printf("Position: (%f, %f) \n", position.value.x,
position.value.y);
})
})
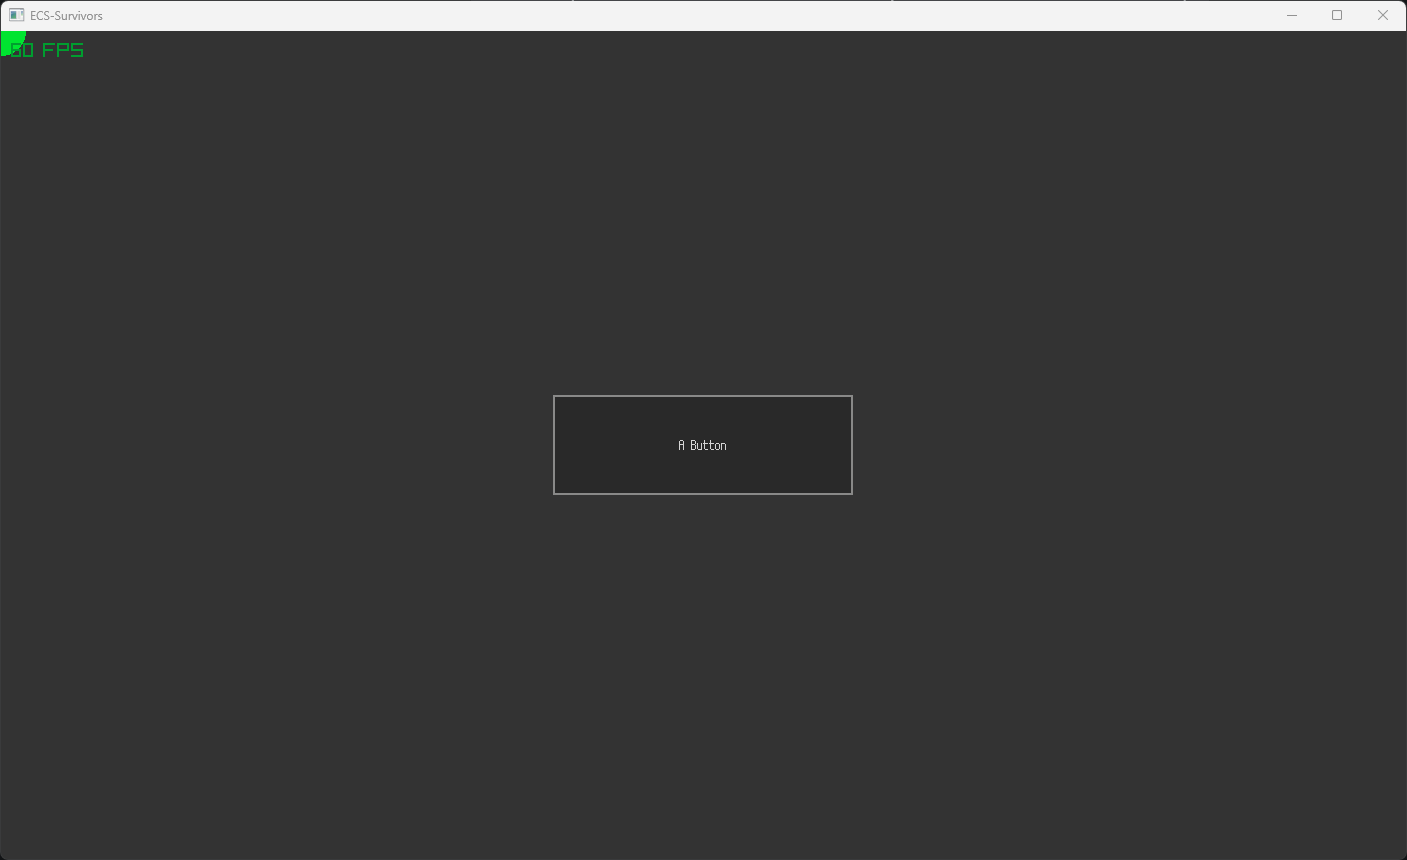
.set<Rectangle>({-150, -300, 300, 100})
.set<rendering::gui::Anchor>({
rendering::gui::HORIZONTAL_ANCHOR::CENTER,
rendering::gui::VERTICAL_ANCHOR::BOTTOM
});With our achors setup, we need to implement two new systems. One that will detect when the screen has been resized, and the other will propagate the changes to the children of the GUI canvas.
world.system("Window Resized")
.kind<PreRender>()
.run([world](flecs::iter &iter) {
if (IsWindowResized()) {
world.lookup("gui_canvas").set<Rectangle>({
0, 0, static_cast<float>(GetScreenWidth()), static_cast<float>(GetScreenHeight())
});
}
});
world.system("On start set move gui elements to match anchors")
.kind(flecs::OnStart)
.run([world](flecs::iter &iter) {
world.lookup("gui_canvas").set<Rectangle>({
0, 0, static_cast<float>(GetScreenWidth()), static_cast<float>(GetScreenHeight())
});
});
world.observer<const Rectangle>("parent rectangle changed")
.term_at(0).parent()
.event(flecs::OnSet)
.each([](flecs::entity e, const Rectangle &parent) {
// need to add the checks here, I posted a question on the
// official flecs discord to see why I was getting an
// infinite loop with .with<>() in the query
if (!e.has<Anchor>()) return;
if (!e.has<Rectangle>()) return;
auto anchor = e.get<Anchor>();
Rectangle temp{*e.get<Rectangle>()};
switch (anchor->horizontal_anchor) {
case HORIZONTAL_ANCHOR::CENTER:
temp.x = anchor->position.x + parent.x + parent.width / 2;
break;
case HORIZONTAL_ANCHOR::RIGHT:
temp.x = anchor->position.x + parent.x + parent.width;
break;
default:
temp.x = anchor->position.x + parent.x;
break;
}
switch (anchor->vertical_anchor) {
case VERTICAL_ANCHOR::MIDDLE:
temp.y = anchor->position.y + parent.y + parent.height / 2;
break;
case VERTICAL_ANCHOR::BOTTOM:
temp.y = anchor->position.y + parent.y + parent.height;
break;
default:
temp.y = anchor->position.y + parent.y;
break;
}
e.set<Rectangle>({temp});
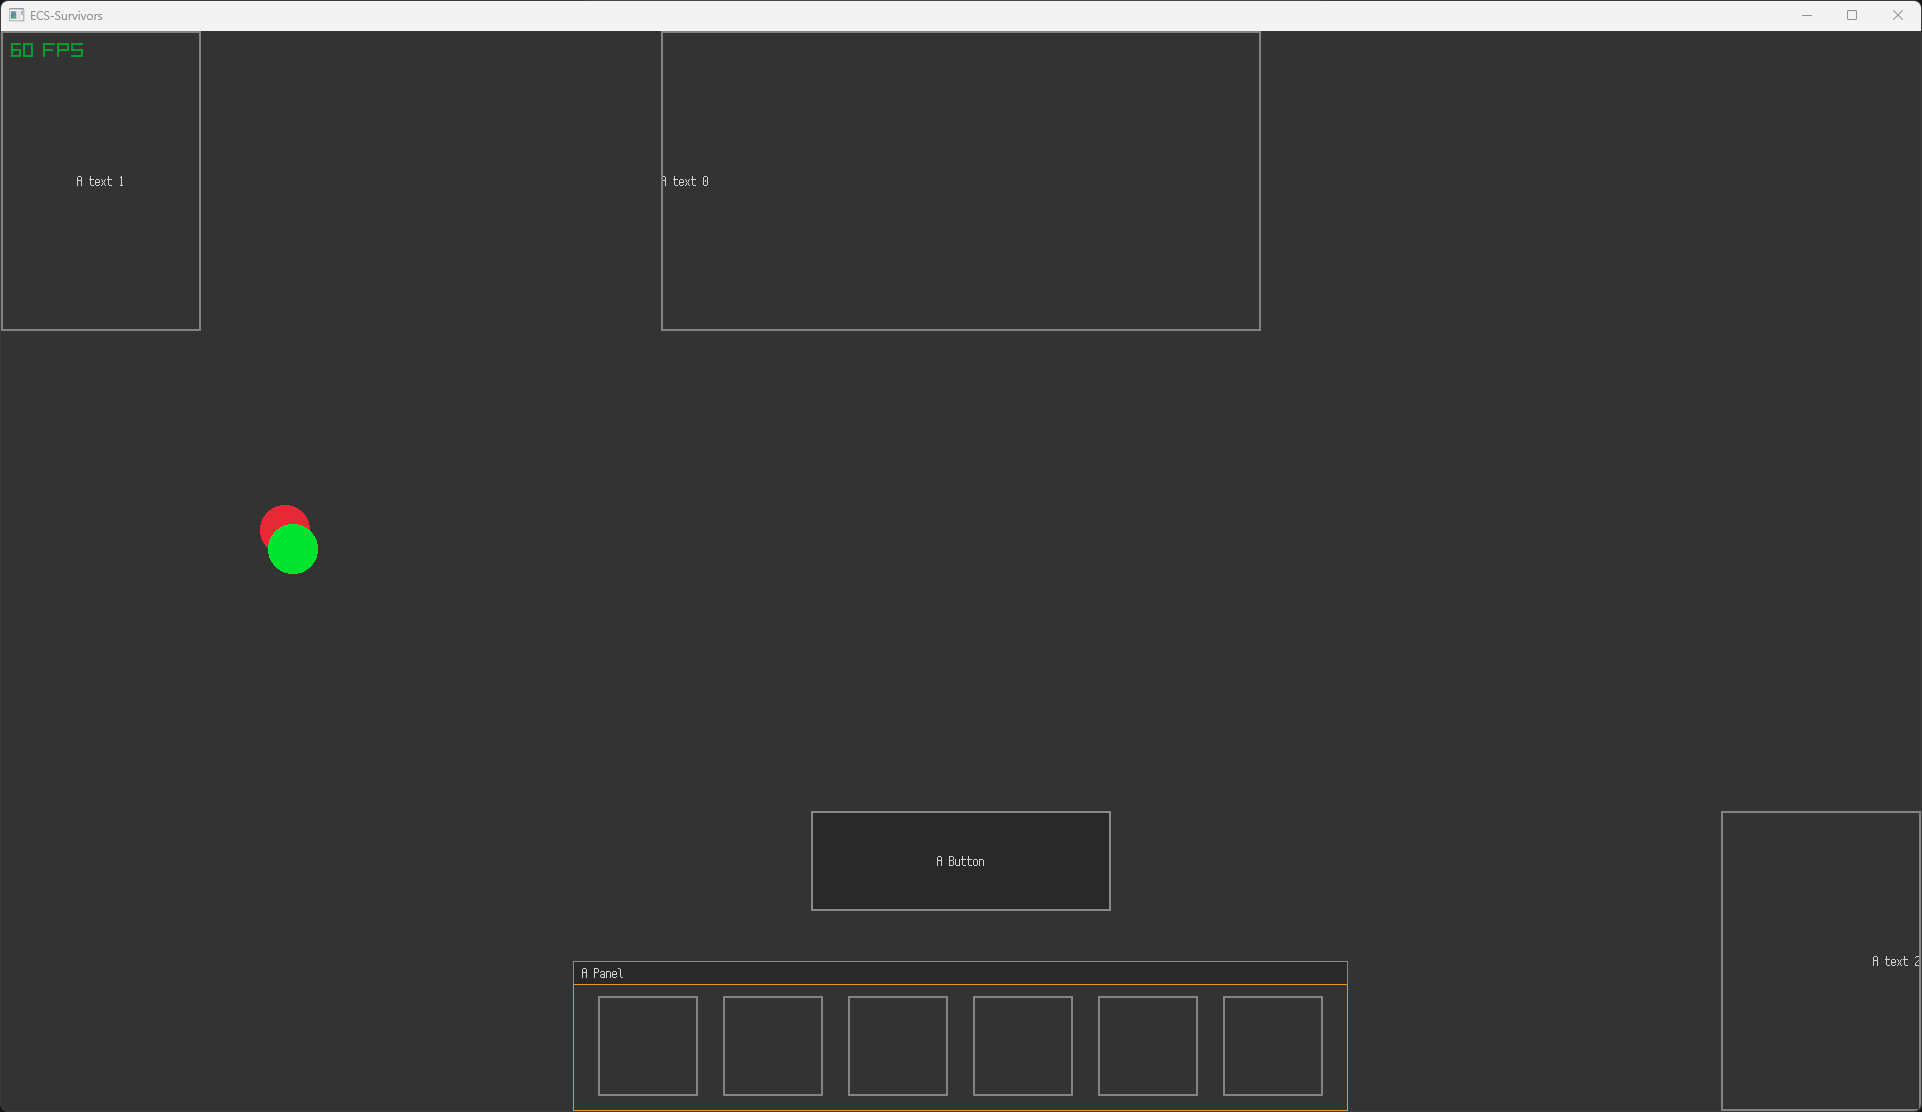
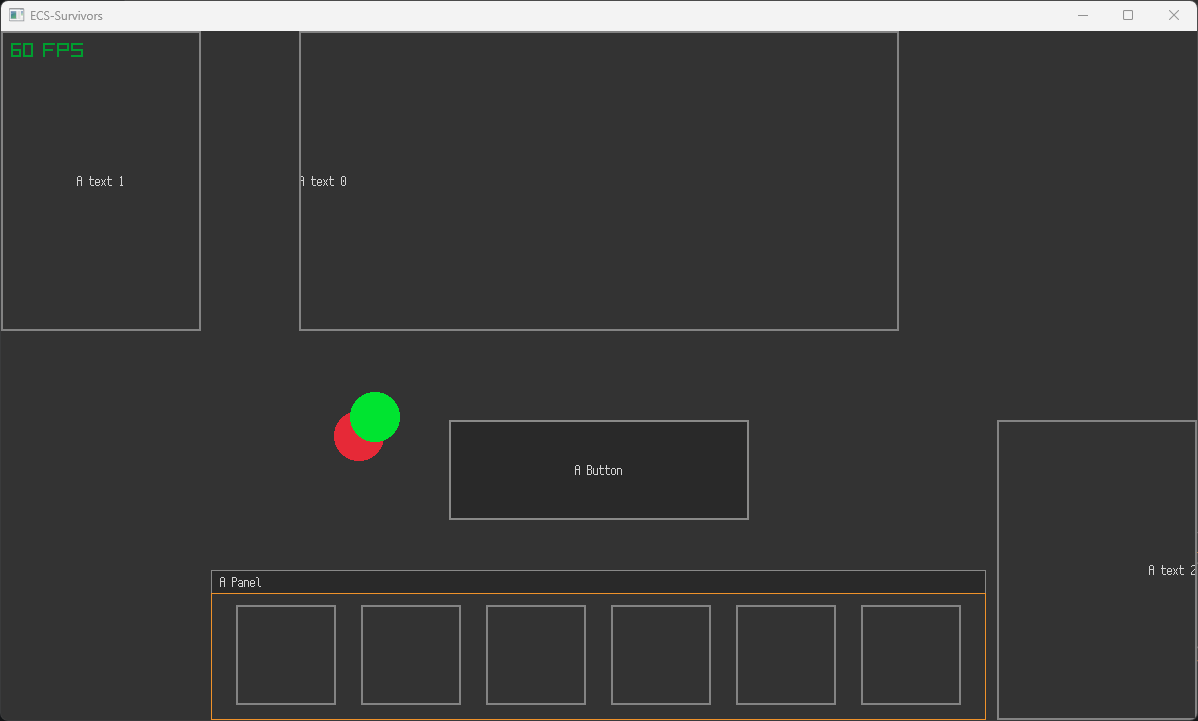
});The second system is quite long but fairly simple. It describes an observer that triggers whenever an entity with a parent that has a Rectangle component is set. Here we set the GUI Canvas entity's rectangle component to match the screen size. This change will be observed by it's children, which will update their own Rectangle component, creating a chain of triggers to eventually update every child of GUI Canvas. Here's the result!
Here is an example of how using the anchors with a bunch of entities might look like
It might be interesting to scale the elements according to the resolution so that people with 4k screens don't have to squint their eyes, but this blog post has gone on for far too long already.
That's it for now, we created a rendering pipeline with custom phases to ensure that we draw what we want, when we want, and we also created a pretty robust GUI module that allows the game to keep the elements in a proper position when anchored properly.
Next time, I want to get dirty and program some physics. We will create a bunch of enemies and collide with them. This should be a lot more fun that setting up another module ;). See you then!